Popular Posts

Read More

From A Guest Bedroom To A Walk-In Closet

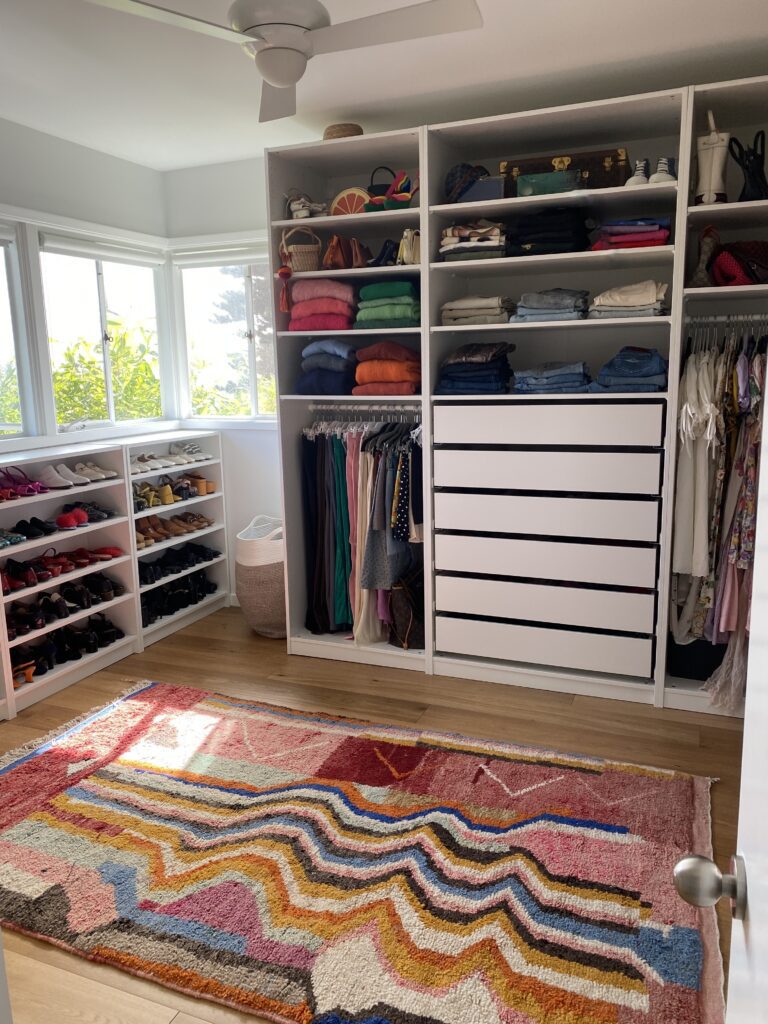
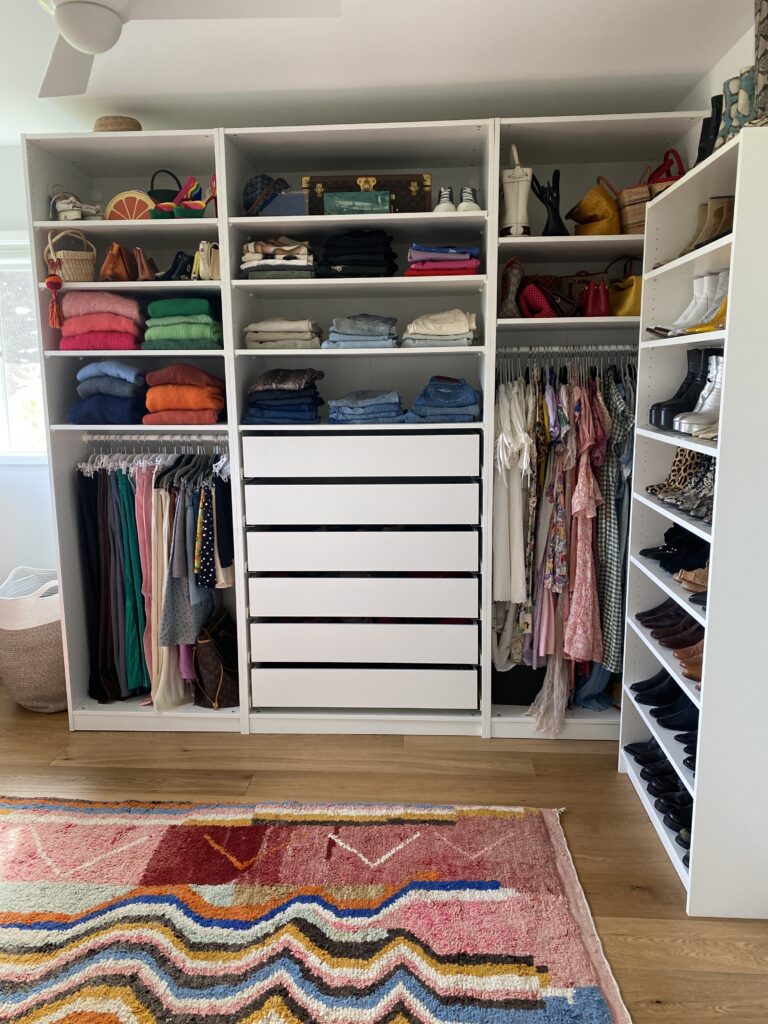
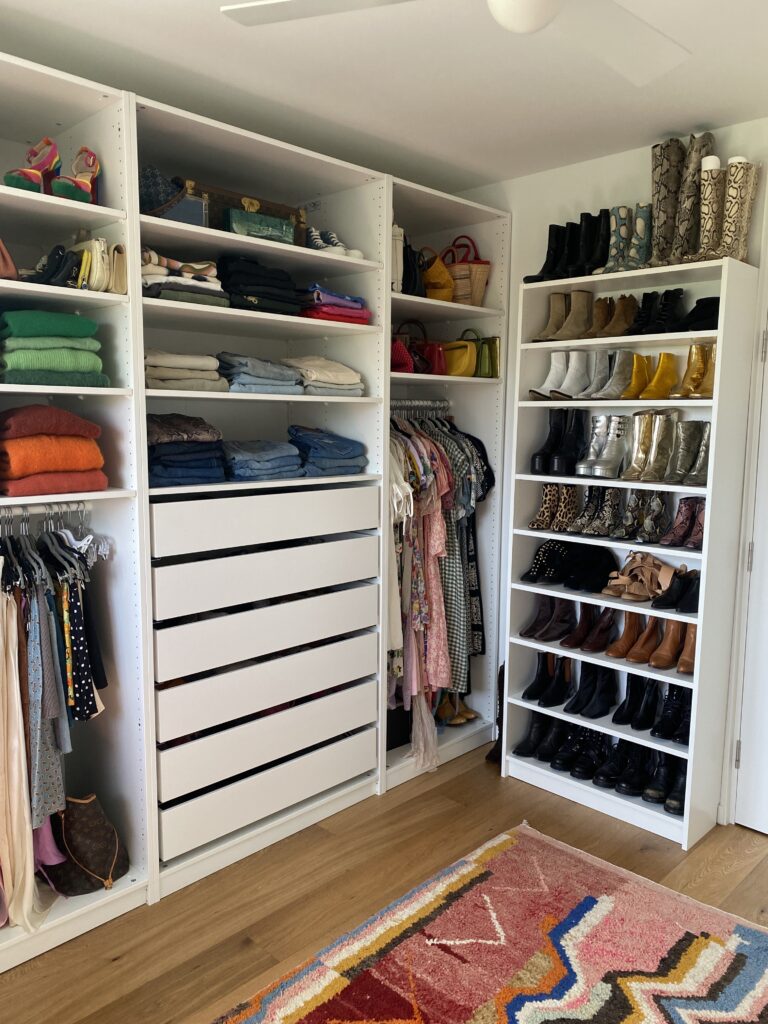
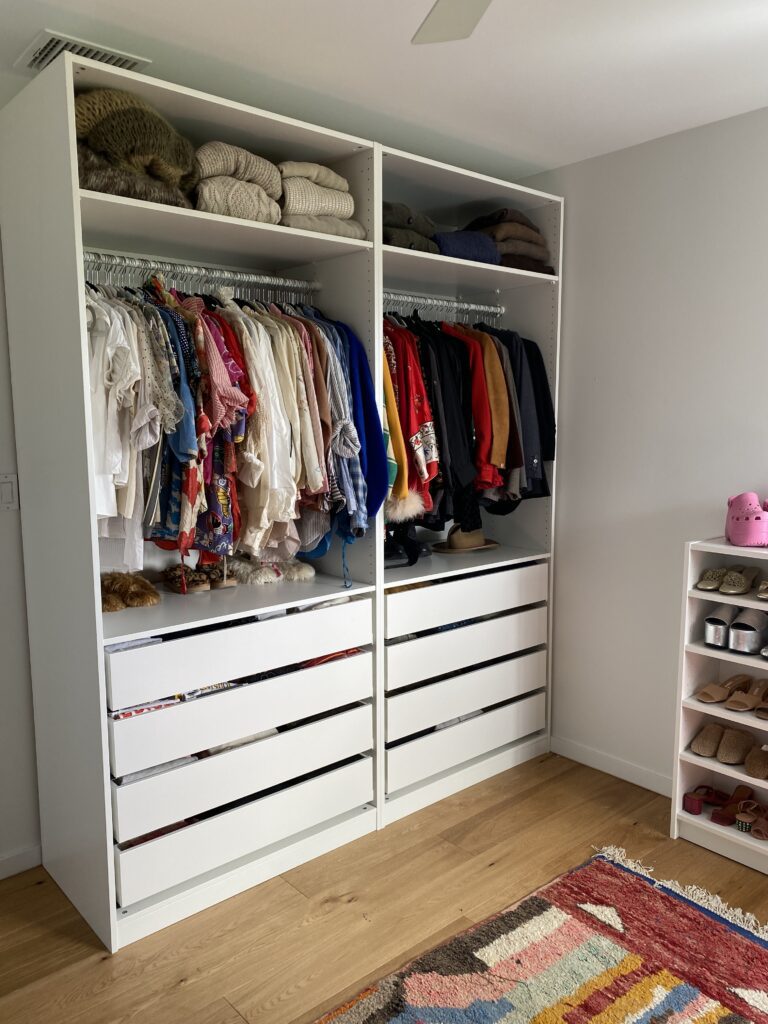
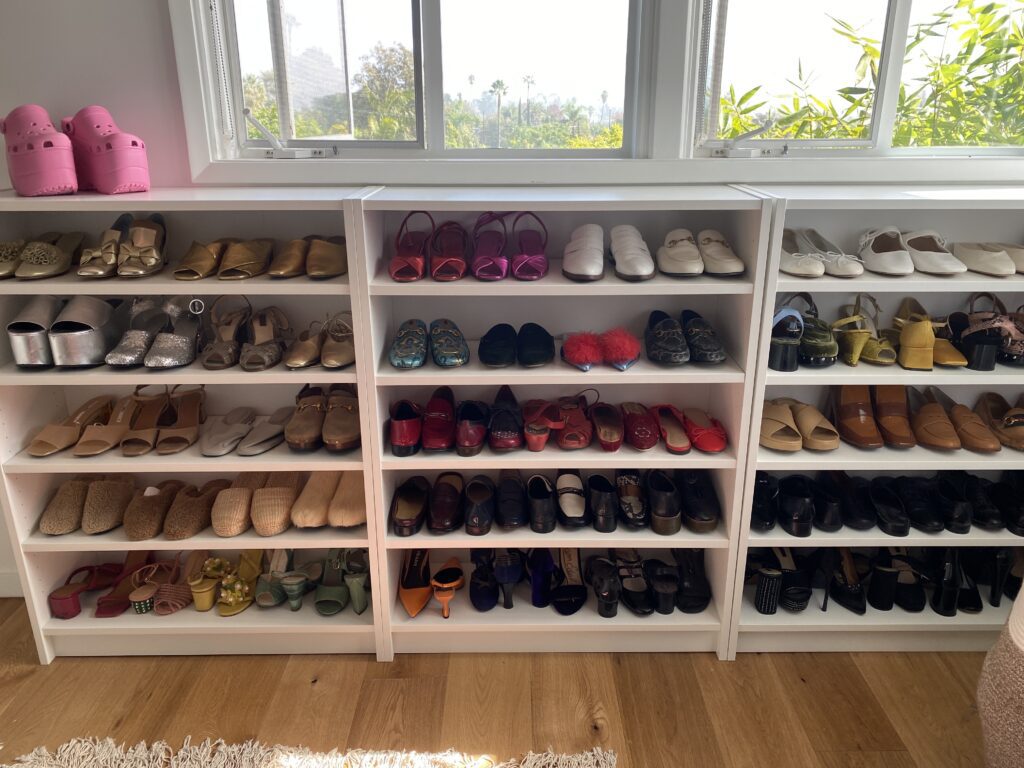
A client of mine moved into a new home and was disappointed with the size of the closets. She had an additional guest bedroom directly across from the primary that was not being used. I suggested we make that into her walk-in closet. We didn’t want to spend too much money on the space because she would eventually upgrade the primary bedroom and closet. I’ve worked with Ikea’s Pax system before and knew it would be perfect for this situation. In addition to the Pax Wardrobes, I also ordered some Billy Bookcases from Ikea for shoes and boots. There was already a nice-sized closet in the bedroom for long hanging, so I kept that in mind when designing the room. To say this room turned out great is an understatement. My client was thrilled with the results and the price point too!

Ikea, Pax, Billy Bookcase, Closet Makeover, Julie Naylon, Walk-In Closet Bedroom, No Wire Hangers, Los Angeles Professional Organizer, Shoe organizing

Pantry Makeover!

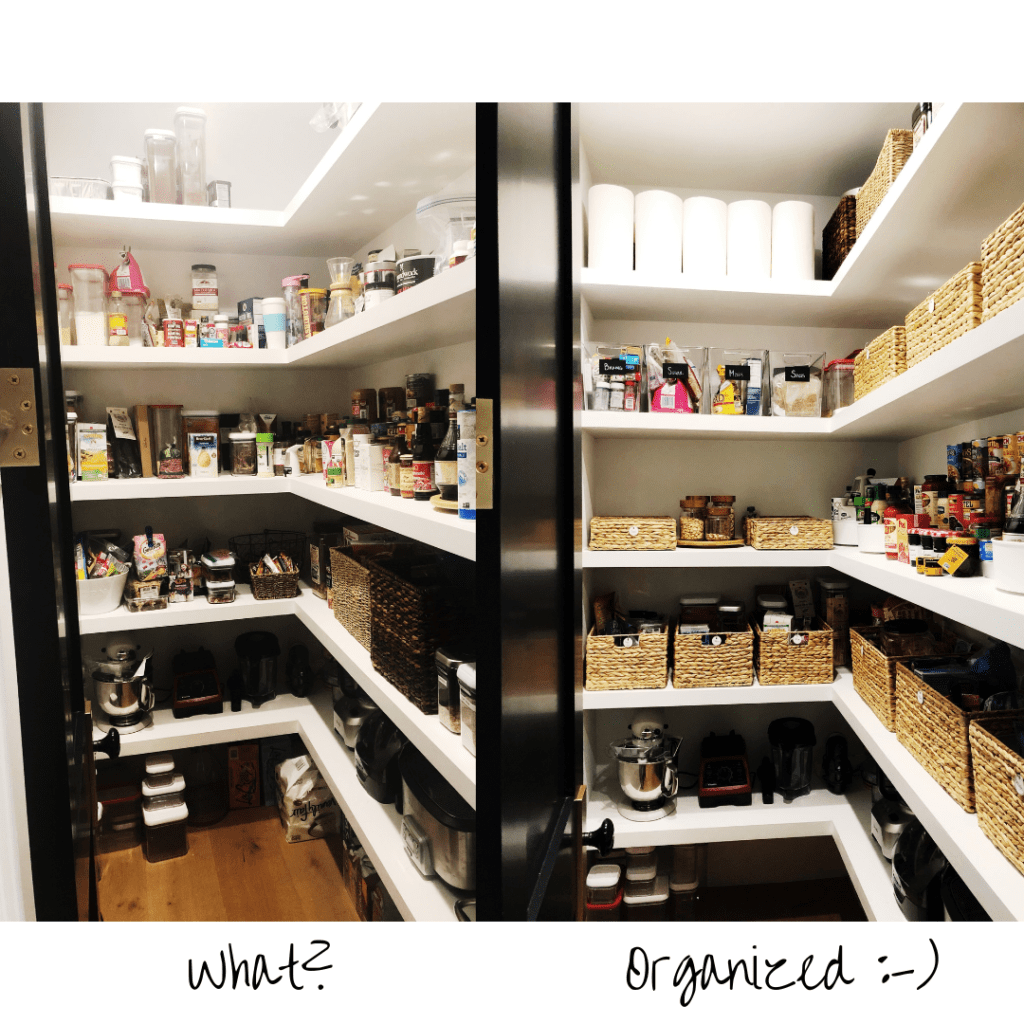
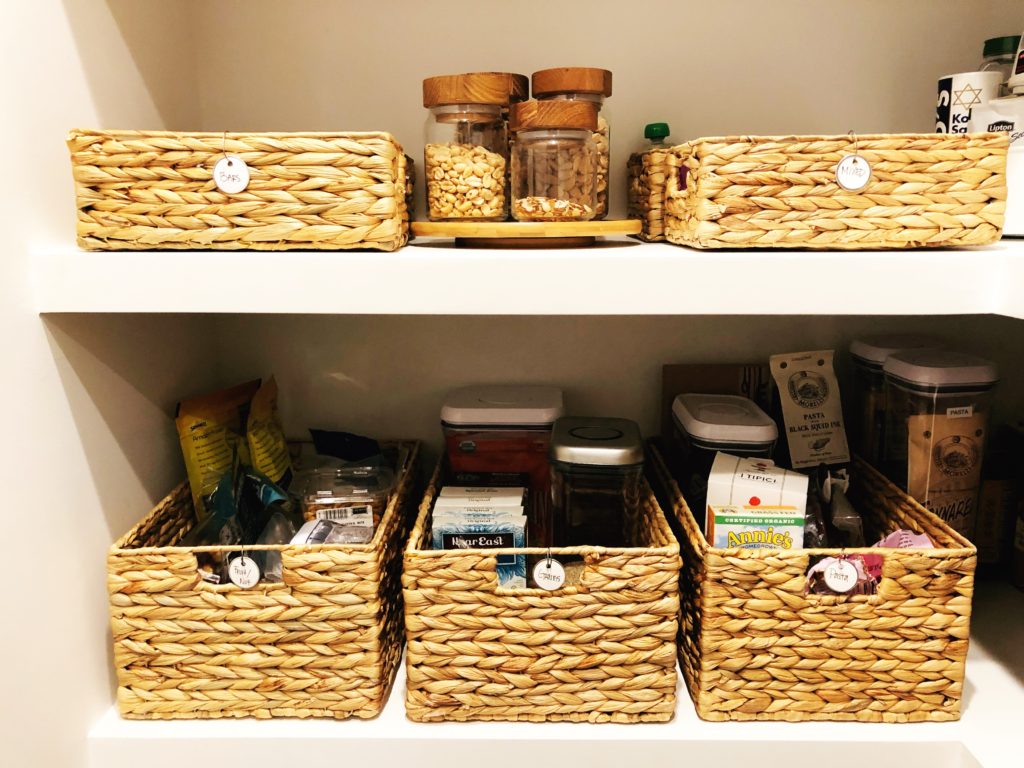
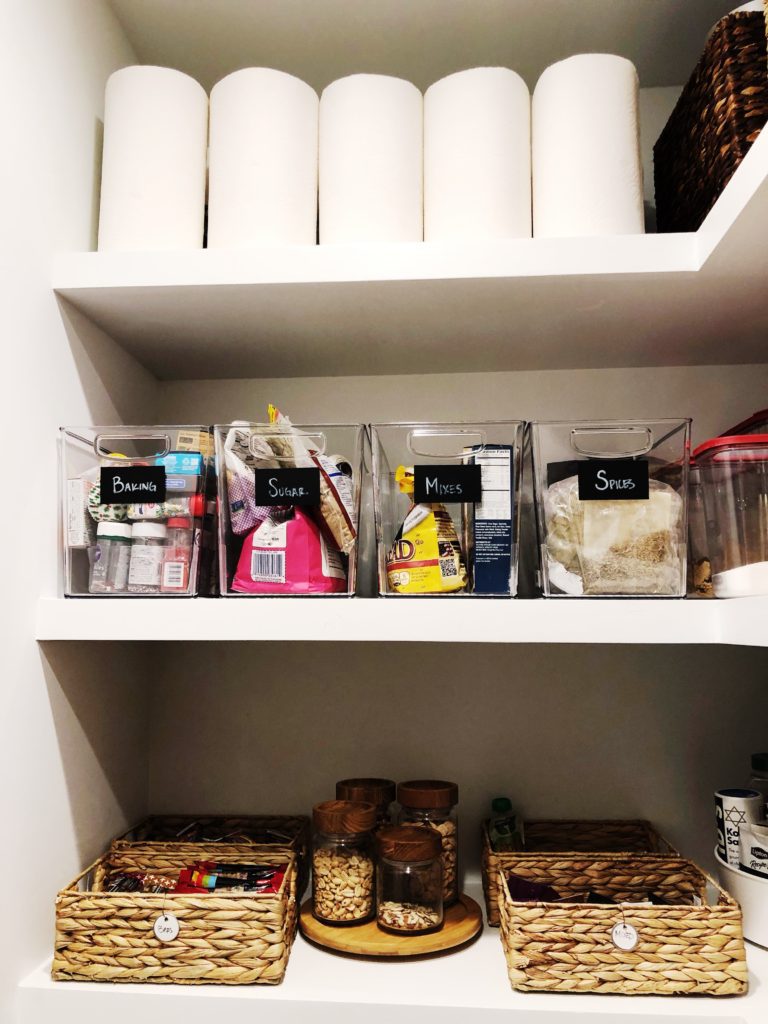
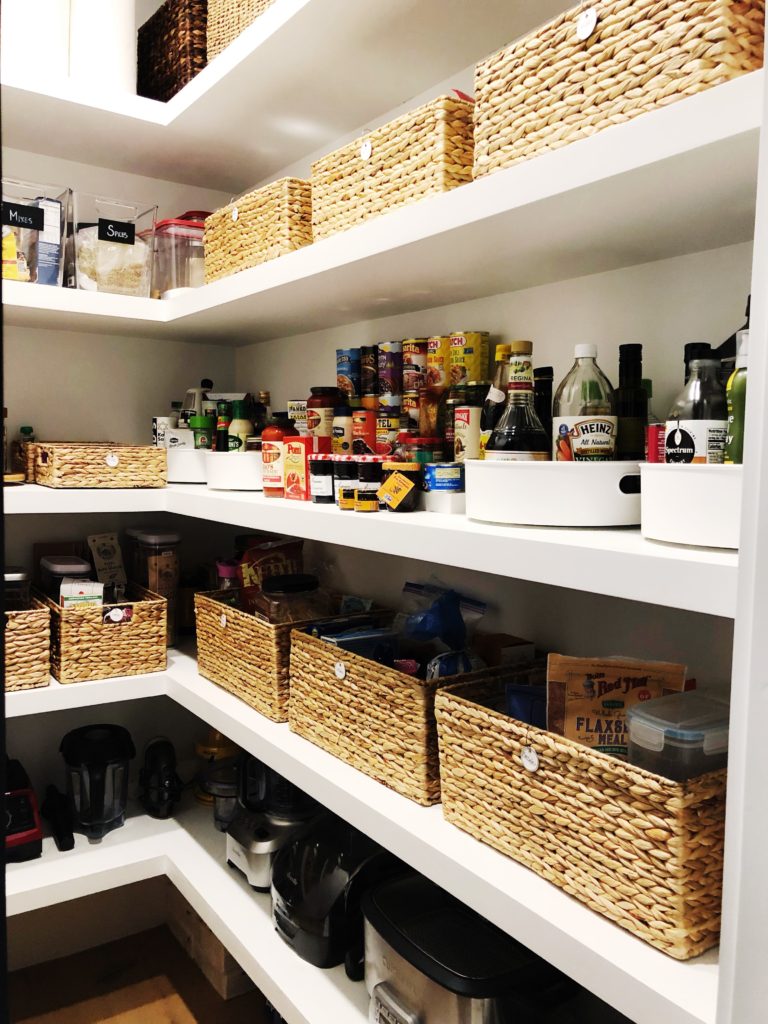
I normally don’t photograph my work because I am respectful of my clients’ privacy. But this client insisted that I take photos. Pantries are normally a pretty quick job, especially when you have a beautiful walk in space like this. Ideally, I prefer nothing on the floor. The first shelf off the floor should be for appliances because they are so heavy you don’t want to have them up high. The next two shelves are PRIME REAL ESTATE, meaning that these are the most accessible shelves for items that you go to the most. The first shelf has these baskets that hold each category, “Chips”, “Crackers”, Breakfast” etc… The next shelf has some lazy susans for “oils”, “vinegars” and a riser for canned goods. And in the very back, I have baskets for bars and jars for nuts. Remember to keep it simple and don’t over-categorize.

Having a pantry that is well kept and organized will save you time and money.

Love Your Home. Outdoor Dining DIY Cement Tile.

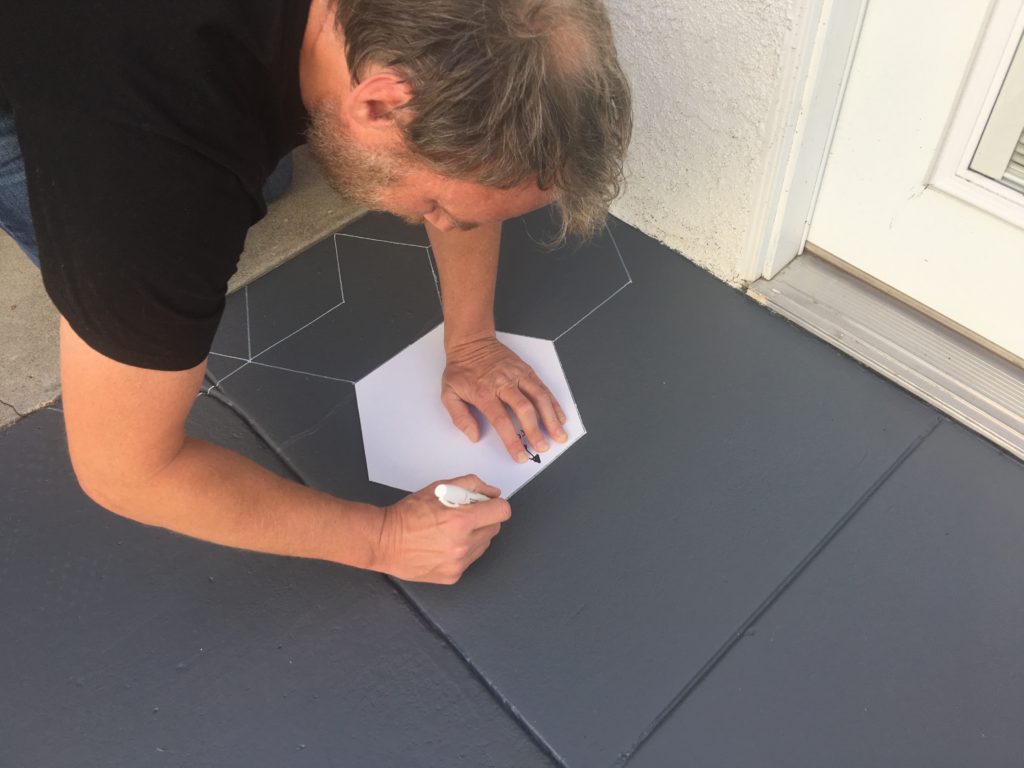
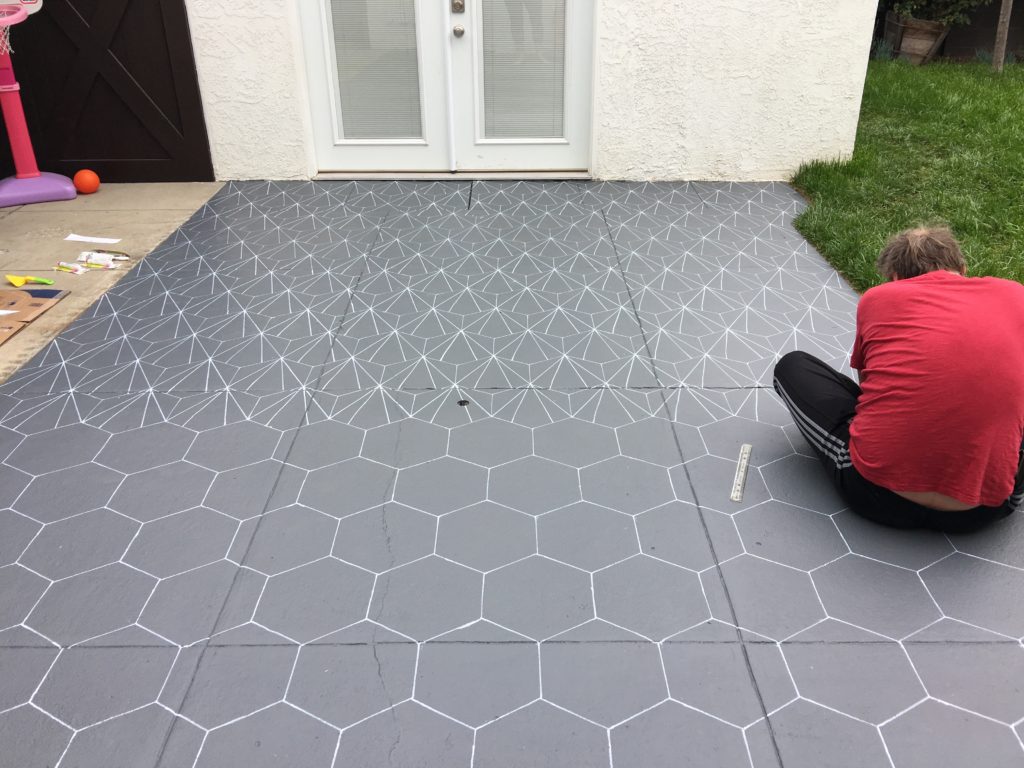
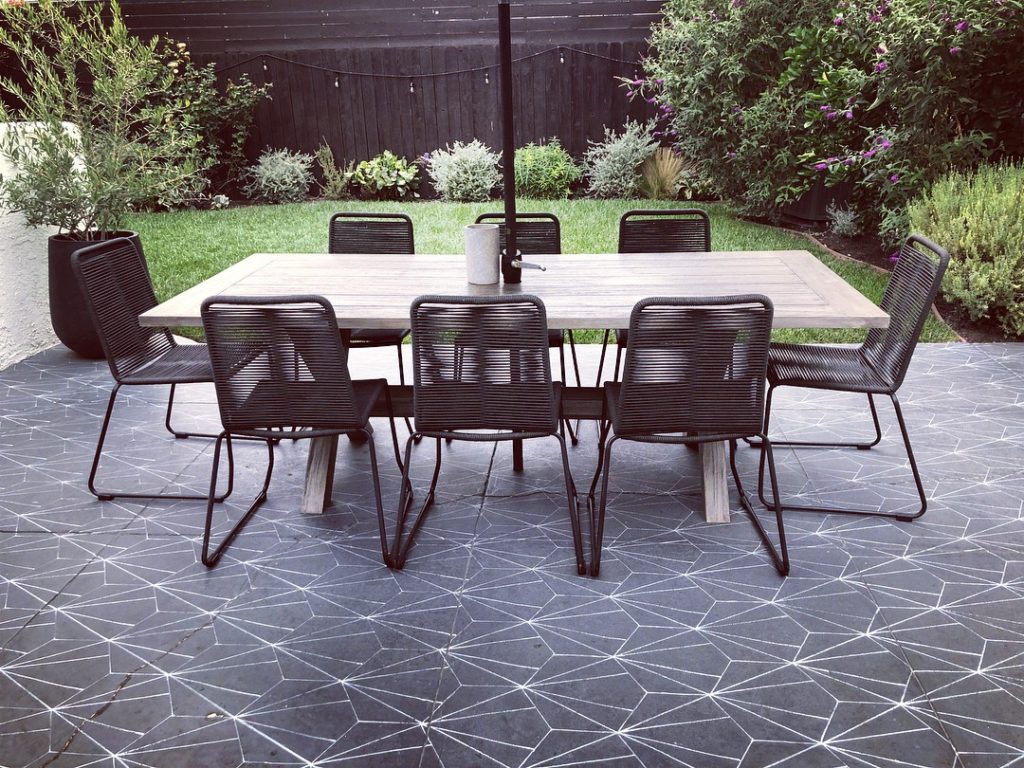
Outdoor dining was high on the list when we bought our house. I fell in love with cement tiles but not the price tag. So instead we opted for this great DIY. Or as Wes calls it DIW (Do It Wes).  Here’s how we/he did it.

(1) Painted the area in grey outdoor paint for cement. (2) Cut out an 8 inch hexagon stencil from a piece of cardboard. (3) Trace the stencil with a white Sharpie Paint Pen, oil based. (4) Use a 12 inch ruler to complete the three lines inside.

We’re very happy with the final results and it’s held up well over the last year with only a few minor touch ups.

diy, cement tile, outdoor dining, hex tile, professional organizer, Los Angeles, Julie Naylon

diy, cement tile, outdoor dining, hex tile, professional organizer, Los Angeles, Julie Naylondiy, cement tile, outdoor dining, hex tile, professional organizer, Los Angeles, Julie Naylon

No Wire Hangers Celebrates 10 Years of Professional Organizing!


10 Year anniversary, professional organizer, Los Angeles Wow, that went by quickly! It still amazes me that I get to work everyday doing something that I truly love. When I started No Wire Hangers ten years ago I had no idea where it would take me. It’s been quite an journey to say the least.


With each passing year what gives me the most satisfaction is working with my amazing clients. If it wasn’t for them working side by side with me none of this would have happened. So thank you for 10 amazing years and I look forward to what the future brings.

xo

For The Love of Your Own Space

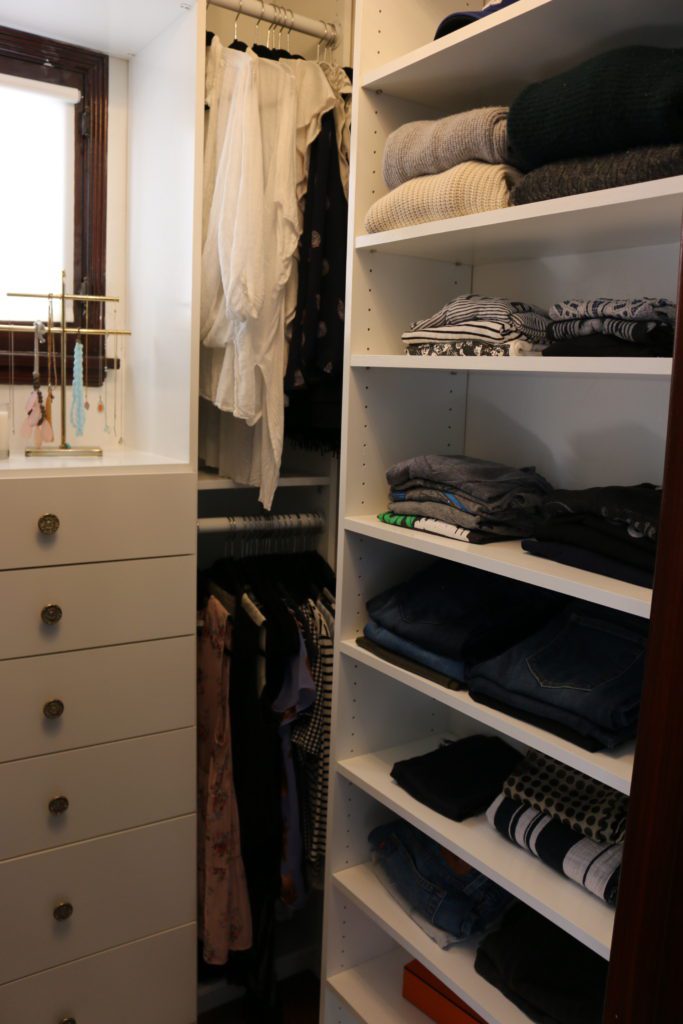
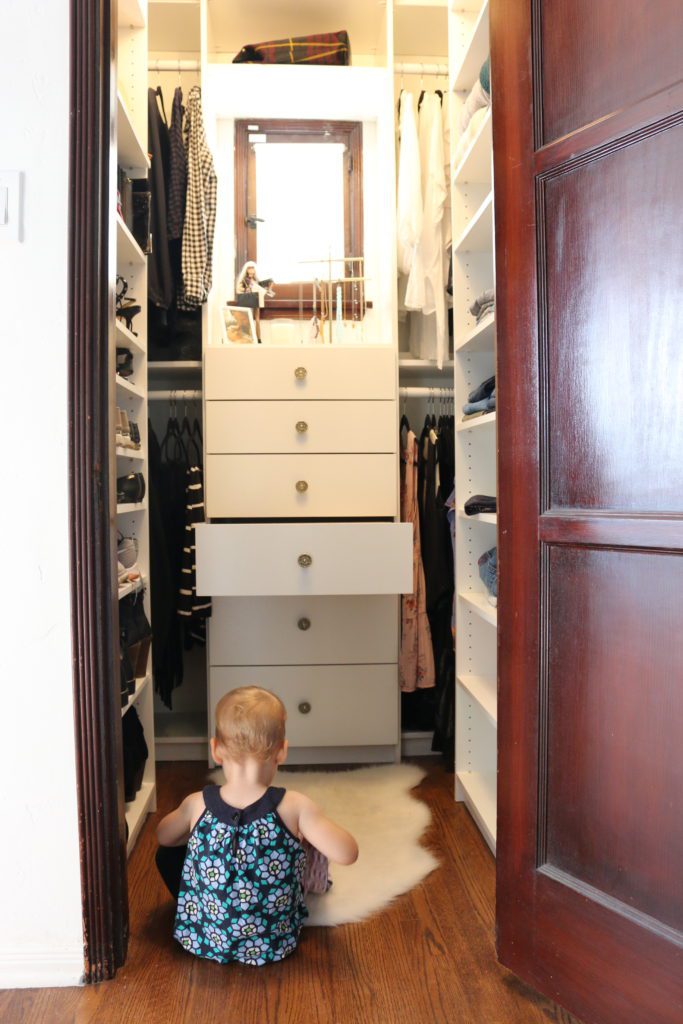
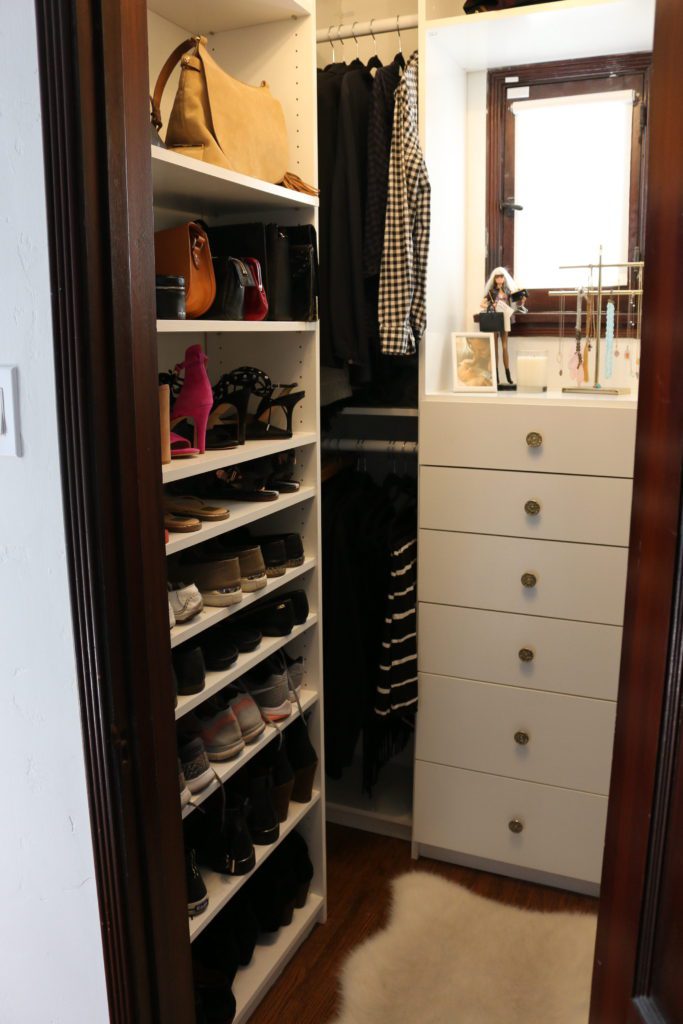
Last year I bought my first house in Los Angeles. It’s a 1932 Spanish Revival in Leimert Park. The house has been pretty much untouched since 1932 so it’s been a journey restoring it to it’s glory. Since I make a living working with clients closets I wanted to have one to really show off. The master bedroom has two closets that were not that impressive. In the hallway there were two closets. One functions perfectly as a linen closet and the other was a walk-in with two rods for long hang storage. I knew that I could easily transform the walk-in to my master closet. It’s right outside my bedroom so it made sense that this could be my closet. I drew up some rough sketches of what I wanted and then I used painters tape to outline the design of the closet. I recommend doing this so you can really get a feel for the space.
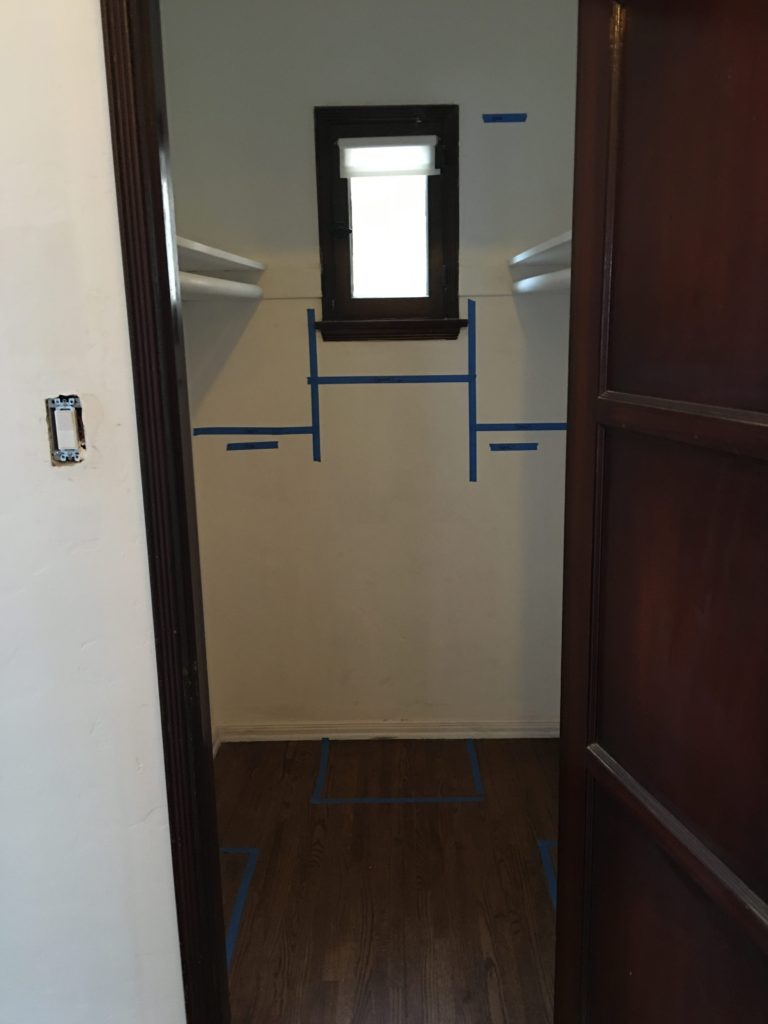
Professional organizer Los Angeles, Julie Naylon, Closet Makeover

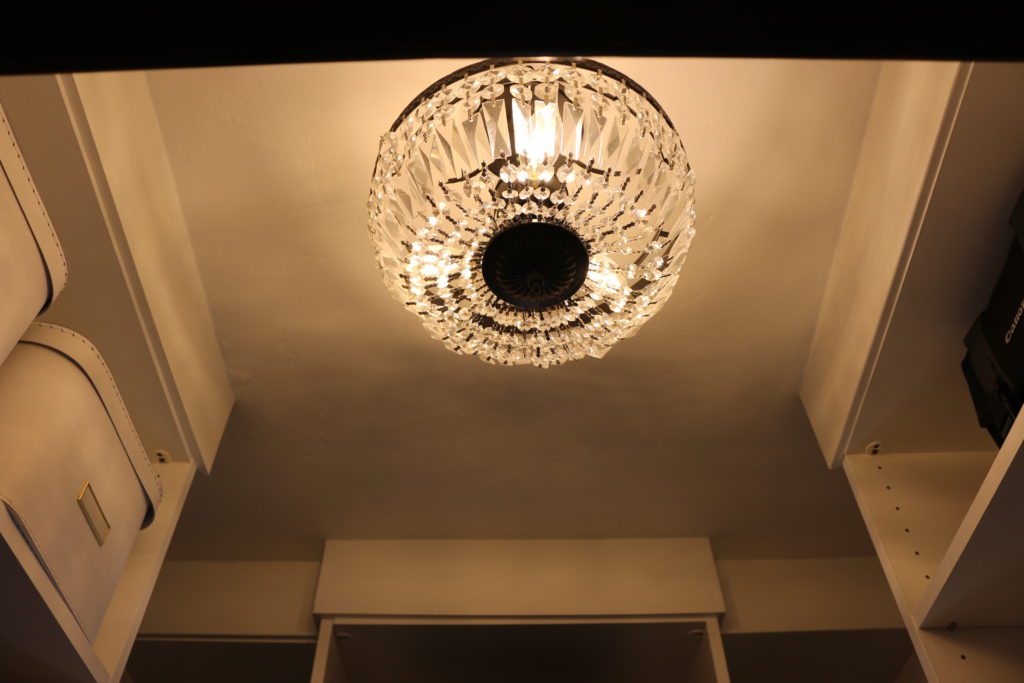
It was important to me to use real wood for the closet, remaining true to the time period. The left side of the closet was a little bit wider than the right so I made this space for shoes. I framed the closet around the window with a double hang on either side and drawers down the middle. I repurposed the nobs from the kitchen after I boiled them in water to remove the layers of paint. The chandelier was a Craig’s List find that added a bit of glam to the closet. The rug was $15 from my favorite, and in walking distance, TJ Maxx. The Organizing Barbie was made by my Mom who gave it to me when I started my business. The space holds pretty much everything except for my long hang which is stored in the second closet in my bedroom.
Professional Organizer, Julie Naylon, No Wire Hangers, Closet Makeover


To say that I am happy with how it turned out would be an understatement. I love that I can get dressed in my closet with the door closed. For only a little more money than I would have spent on a dresser, I was able to build my dream closet. And most of all I love watching my daughter Maude play dress up in Mommy’s closet.